Accidents happen, plans or steps for spill response in place for when a spill in the workplace occurs keeps you safe.
These 8 steps for spill response, which can assist you when responding to a chemical, oil or hazardous spill.
STEP 1 – ASSESS
As soon as you encounter a spill – and until it has been successfully dealt with – you must constantly assess the risk it poses to personnel, the environment, and property. You should never tackle a spill on your own. Inform colleagues and wait for at least one other person before dealing with an incident.
STEP 2 – PROTECT
Always wear the appropriate personal protective equipment (PPE) to allow you to safely respond to the spill. Check the safety data sheet for any hazards associated with the liquid spilled and then dress accordingly. If in doubt, assume the worst and wear the highest level of PPE. For rapid response, the location of spill containment equipment should also be marked on a readily available site plan. An inventory of on-site chemicals will help responders to understand what they are dealing with.
STEP 3 – CONTAIN
Following a spill, containment is crucial. It buys time and reduces the area of contamination, thereby lessening the spill’s impact. Use absorbent socks and booms or physical barriers to provide fast, effective containment. It is always better to try to keep any hazardous spill on the surface, so spill kits should be located next to storage areas, with sealing products positioned next to site drains.
STEP 4 – STOP THE SPILL
Once the spill has been contained, you need to stop its source, whether that involves rolling a drum damaged side up, turning off a tap, or plugging the hole in a container. If appropriate, decant any remaining liquid into a secondary container. Remember: never step in the spill.
STEP 5 – REASSESS
After the spill has been contained and the source controlled, reassess the entire situation before starting the clean-up. Ensure that the spill is fully under control.
STEP 6 – CLEAN-UP
This can be as simple as wiping up with sorbent pads, through to using additional sorbents and/or a compatible “wet vac”. Remember to treat contaminated material with the same caution as the spilled liquid itself and dispose of it accordingly.
STEP 7 – DECONTAMINATION
Ensure all personnel involved with the spill are fully decontaminated; at the spill site, all PPE and equipment must also be fully decontaminated and checked. If items have been damaged or cannot be fully decontaminated, dispose of them accordingly and replace them with new ones.
STEP 8 – REPORT AND REPLENISH
Debrief all personnel involved, compile a complete report of the incident, and fill out all associated paperwork. If need be, change your procedures and/or the location of some or all of your spill response equipment. Remember to replenish/restock all front-line equipment and backup stocks, such as PPE and drain covers. Learn from the experience; you will be better prepared should there be a next time. Staff training is paramount: they need to be familiar with the layout of the site, the equipment they will be using, and how to use it safely and effectively. Hopefully, any incident will be a rare occurrence and the only time your staff will need to respond to a spill is during regular refresher training. This training should be programmed in as a matter of course, just like any other training, such as first aid or fire extinguisher use.
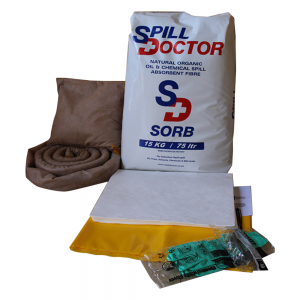
You can view our range of spill kits (here).
Spill Doctor’s mission is to assist companies in creating safe and complaint workplaces by providing a range of environmental and health and safety products.